
The SailBot app runs beautifully on iPad but the process to install it is not exactly straightforward and intuitive. While not difficult, we find it helpful to have a brief tutorial on the process for those who aren’t familiar with installing an app that is formatted for iPhone onto an iPad. A future update will make this unnecessary but for the time being please follow this simple process to install the app on an iPad.
Click on any of the images below to view them larger
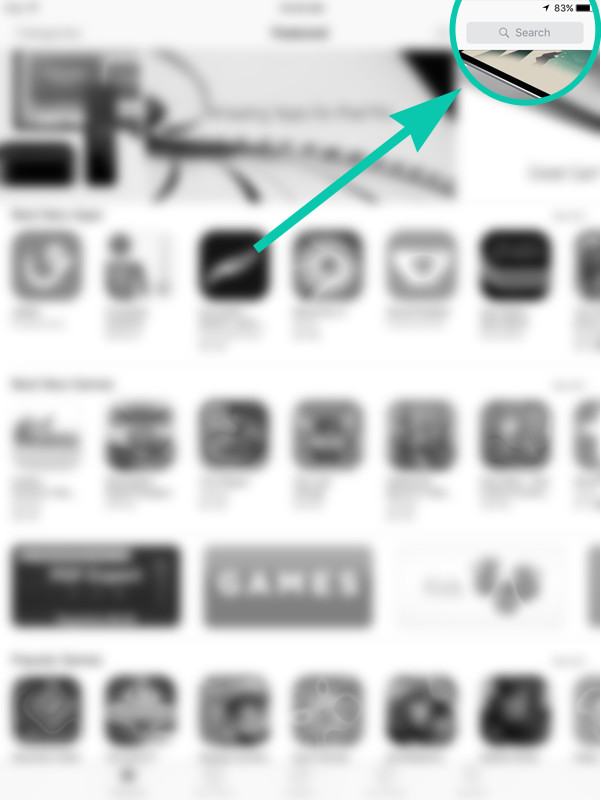
Step 1 – Open App Store
On your iPad, locate the icon for the Apple App Store. You are very likely familiar with this.

Open App Store
Step 2 – Search App Store
In the upper right corner of the App Store screen is the search form. Tap on it. The keyboard will appear. Type “sailbot” (without the quotes) and then tap the blue Search button.
Search App Store
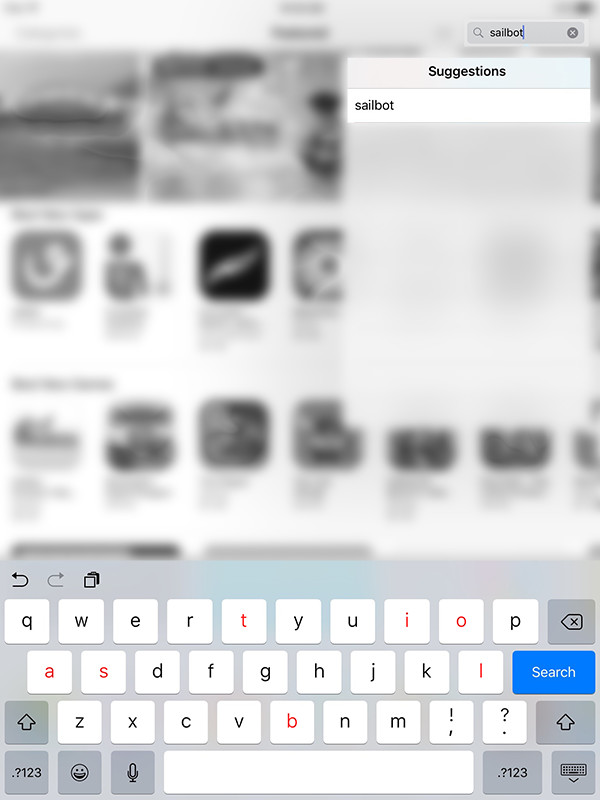
Type ‘sailbot’
Step 3 – Show Apps for iPhone
By default the iPad App Store only displays apps that are specifically formatted for the iPad. The SailBot app is formatted for iPhone so you need to tell the App Store to display iPhone apps. This is a really simple process! Just look in the upper left corner where it says “iPad Only” and tap on that. A drop-down menu will appear. Simply tap on “iPhone Only” and then you’ll see the SailBot app appear.
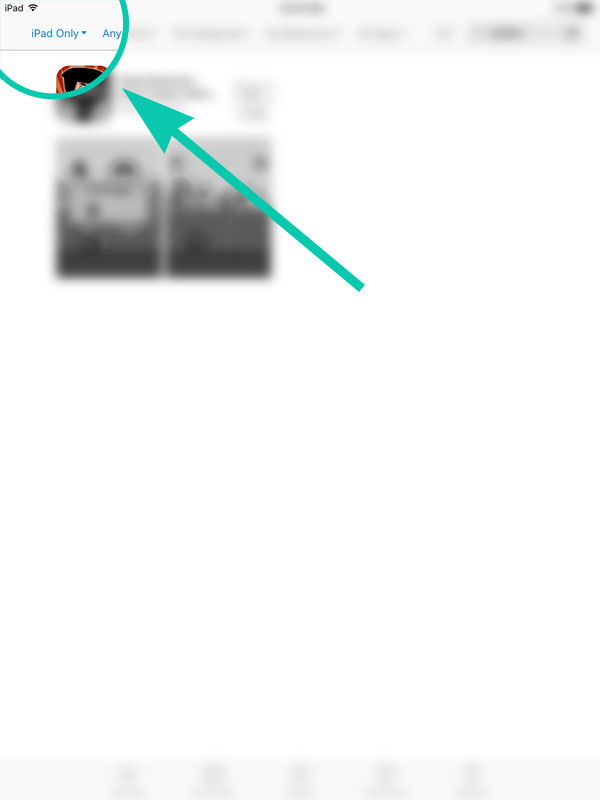
Tap on ‘iPad Only’
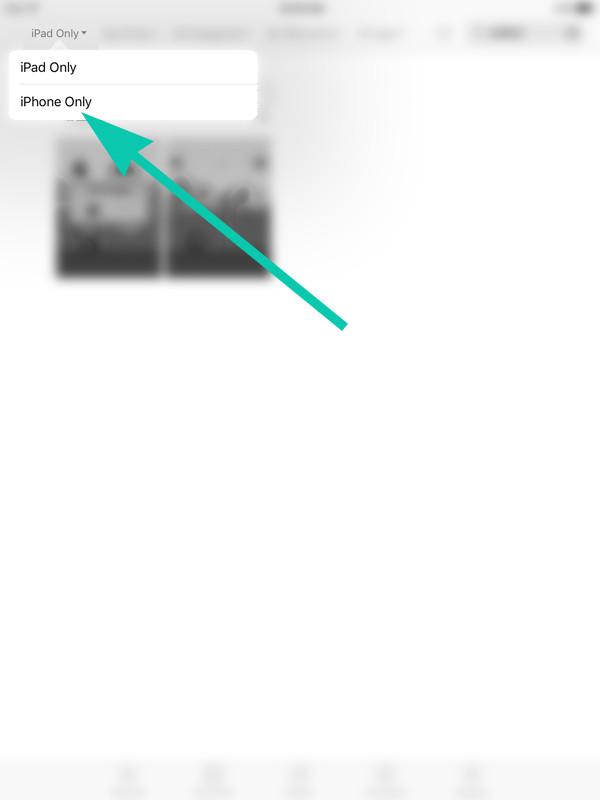
Select ‘iPhone Only’
Step 4 – Get SailBot App
When the SailBot app appears as one of the apps available, tap “Get” and the app will be installed on your iPad. Your Apple ID password may be requested if this is your first time installing the app on any of your devices. If you have installed the SailBot app on another device associated with your iCloud account, you will see a download from iCloud icon in place of “Get”.
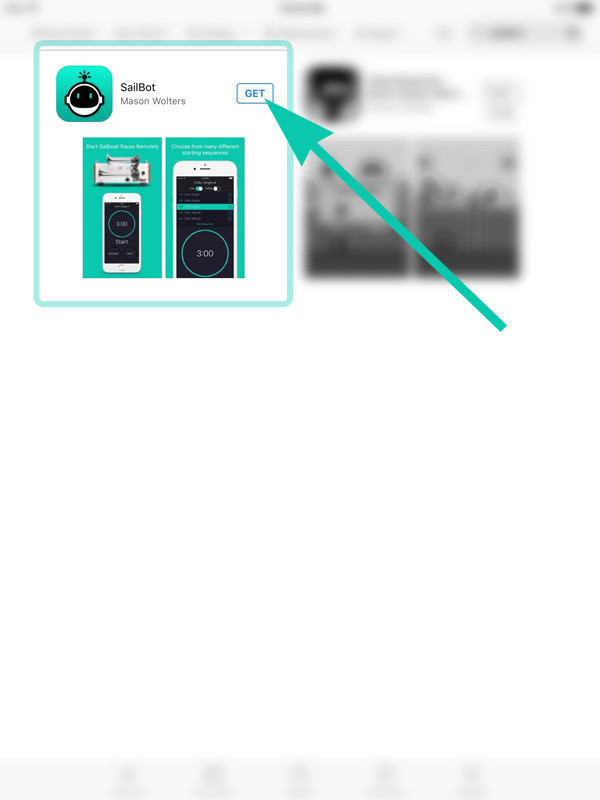
Tap on ‘Get’
Enjoy your SailBot!
Now get out on the starting line and run some races. Thank you for your support of our product!